To the optimist, the glass is half full.
To the pessimist, the glass is half empty.
To the project manager, the glass is twice as big as it needs to be.
This tutorial will show you how to add or set up a new project within your organization.
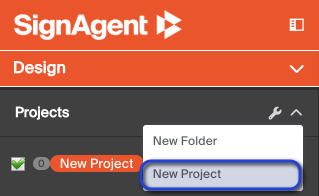
Once you've selected the organization, you can add a new project by clicking the wrench next to Projects and selecting New Project.
Note that when you create a new organization, it will always have at least 1 project with at least 1 state in it. If you want, you can just edit this existing project instead of creating a new one. This can be done by right-clicking on the project name in the left-hand sidebar, and choosing Edit.
Details
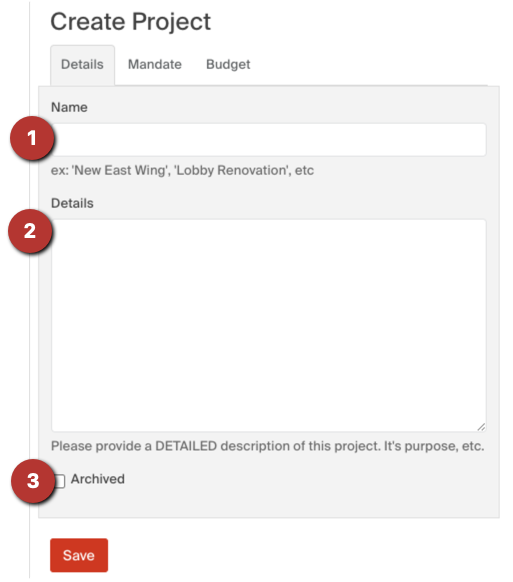
Firstly, you can add details of your project. Note that the only mandatory field here is Name. All other ones can be ignored, if you so choose.
Fields that can be filled out here include:
- Name - the name of the project. This is how this project will show up in your sign dialogs and within your reports.
- Details - This is a space where you can add details about what this project will entail. This can be especially useful if you'll be collaborating with other people who may be interested in such things.
- Archived - Once this project is complete, you can Archive it. This will hide it from the dashboard.
Mandate
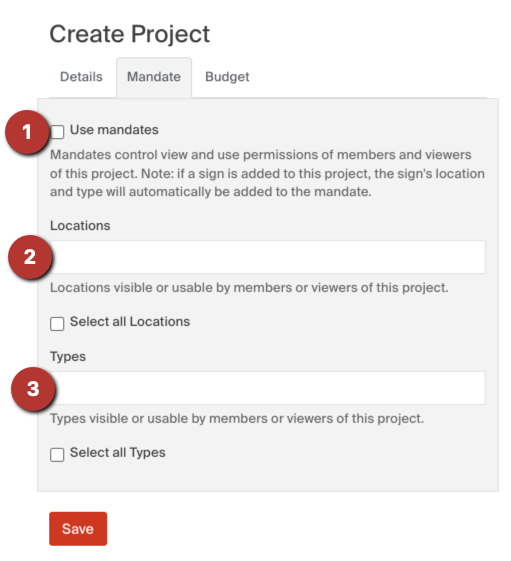
Mandates are a way for you to specifically define what locations or sign types are included within this project. Any members or viewers that are invited to this project will only have access to the locations and sign types that are specified here.
- Use Mandates - Choose whether or not this project will use mandates or not. Note that if you do not opt to use mandates, all locations and sign types will be available for this project's members & viewers
- Locations - Choose what locations will be included in this project's mandate. Note that you can select as many or as few locations as you'd like.
- Types - Choose what sign types will be included in this project's mandate. Note that you can select as many or as few sign types as you'd like.
Budget

This will allow you to set the budget for this specific project. This number is used in the Project Overview and Sign Estimate Reports.
When you save a new project, you'll be asked if you want to import states into it. See more info on this here: Importing States
Note also that you won't be able to add signs into your new project until you Add a State