A SignAgent state of mind!

You can add a new state by right-clicking the project that this state will be part of, and choosing New State.
If you want to organize your states by folders, you can also choose to add a New Folder. If you then right-click on the new folder, you can choose to add a new state within that folder instead.
Details
You can now enter in any details for this state. Note that the only mandatory field here is Name. All other ones can be ignored, if you so choose.
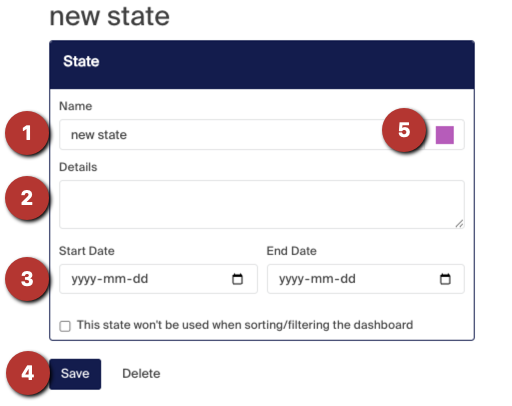
Fields that can be filled out here include:
- Name - Pretty self explanatory! Give your state a name.
- Details - This is a space where you can add any details about what this state will entail. This can be especially useful if you'll be collaborating with other people who may be interested in such things.
- Start Date & End Date - This can be useful if you have a timeline in mind for this state.
- Save - Always remember to save your work!
- Hex Colour - This colour will populate automatically and won't be visible anywhere - however if you'd like more information on how this feature can be useful, check out this article.
Action
Here you can choose what "type" of state this is. If you choose "design" and hit save, you will see your new state appear on the left sidebar under your project.

If you choose "review", you will see everything change colour to SignAgent's assigned "review" state, and you will see an additional window below where you can enter more information.

- Permissions - Any team members added here will be invited to join this state, and perform the "actions". You can invite people by clicking on the "permissions" button to the right and entering their emails. Anyone currently assigned to this state will appear where it says "Assigned Users". Note that anyone assigned here will only be able to see and review signs in this state, not the entire project.
- Actions - These are actions that the Assigned Users can perform. The defaults are Approved and Rejected, but you can change the labels to whatever you'd like.
Don't forget to hit "save" when you are finished!