SignAgent has the ability to automatically number your signs for you, with a number of customization options available to fit your needs. This tutorial will show you how to make the most of this feature.
How to Use Auto-Numbering
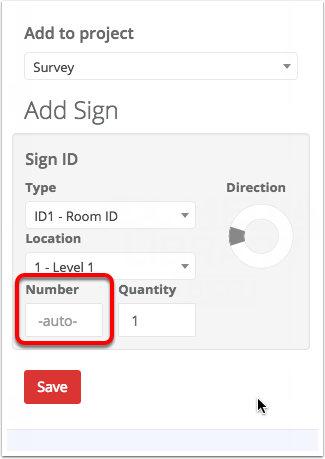
Using auto-numbering in SignAgent is pretty straightforward. When you create a new sign, leave the number field alone, and Save. SignAgent will then automatically assign a number to the sign based on your preferences.
Typically, this number will take the maximum number that's ever existed on this location plan, and increment by 1.
Setting Auto-Numbering Preferences
- Click on your organization name
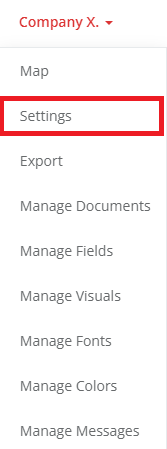
- Choose "Settings" and scroll down to the bottom of the screen to the section named "Sign".

- Configuration: This allows you to customize how your sign tags appear on your location plans and in your reports.
- Auto-numbering: Here you get to choose from 5 different options:
- Do Not Auto-Number: This option will not fill out the number field automatically, and you will have to enter number values manually
- Location: This option will use each number once per location, regardless of type.
- Type-Location: This option will use each number once per type per location.
- Type: This option will use each number once per type, regardless of location.
- Organization: This option will use each number once throughout the whole organization.
3. Highlight Duplication: Here you can choose whether or not you want number duplications (as specified by your auto-numbering settings) to be highlighted by SignAgent.
4. Don't forget to Save once you're done!
What is a duplicate? Auto-numbering is the answer
The settings we choose for auto-numbering change what the system will count as a duplicate.
Example: There are signs 1, 2, and 3 and Floor 1 and signs 1, 2, and 3 on Floor 2. They are all Sign type A. The following auto-numbering schemes would change whether they are considered duplicates.
Organisation - Yes there will be duplicates. There are two sign 1 in the organisation and therefore they are duplicates.
Type - Yes, there will be duplicates. Sign type A already has a number 1 so when a second is created on another floor it will be considered a duplicate.
Location - No, there will not be duplicates. There is only a single sign 1, 2, and 3 of Floor 1. The count starts over when moving to Floor 2.
Type-Location - No, there will not be duplicates. If the numbering starts over for each sign type on each location then the same logic as in the Location numbering above holds true here as well.