
Probably a pretty important thing to know.
Basic
- Right-click on the map where you want your new sign to go.
- Choose the direction, state, sign type, and location.
- Save (or press cmd+S or ctrl+S)
The location is automatically assigned to the current one being viewed.
The number will be automatically assigned, based on your auto-numbering settings
Snap and Orient to Walls
The snap and orient tool is found in the bottom right of the map window. It will attempt to read the blueprint so that created signs are automatically placed along a wall and in the correct orientation.

Create Many Signs
Toggling the "Add Mode" in the bottom right corner to "Quick Add" changes the sign creation workflow.
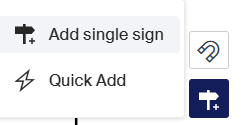
A popup will open. Once the state and sign type are selected, signs can be added by right clicking on the plan without the need to save between each sign. The Undo button will remove the last sign that was created through this workflow.

Closing the window will revert to the single side add default.