- Check out a video-overview here: Intro to Templating
- You can also use this A2-Room ID.ai template as an example file.
If you ever have too much to do or artwork that is more complicated than you can currently do, our services team is here to help. Reach out to services@signagent.com to find out about the training and templating services we offer.
1. Create the Sign
Follow the instructions below to create dynamic sign templates using SignAgent.
- Draw your signs as you always do.
- Move everything to one layer and call it "Sign" or "Preview"
- Create a sub-layer for each field that you want to be dynamic. The name for this sub-layer should match the field name, except that it should be all lower case, and replace space with _
- Move text into that sub-layer
- Create a no fill / no stroke rectangle to the size of the box to be filled
- Rename the layer using alignment commands
- One of (left, center, right)
- One of (top, middle, bottom)

When creating field names, follow these rules:
- Layer names should be all lowercase
- Spaces should be replaced with "_"
- Special Characters should be ignored completely
For example, "Room Number" becomes "room_number"
If you're unsure about how to name one of your layers, check out the replacements section in the Fields tab of the Edit Type page
Note that manual kerning isn't supported yet, so make sure to use kerning of "0" or "Auto"
2. Exporting Signs
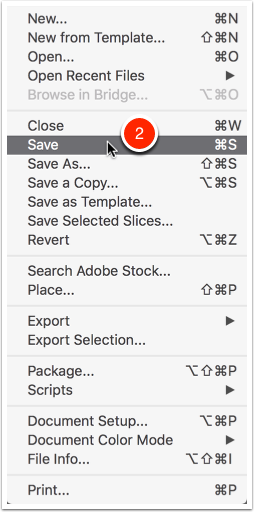
2.1. Save sign
- Select File (not shown)
- Select Save
Make sure that you save it in a place where you can remember.
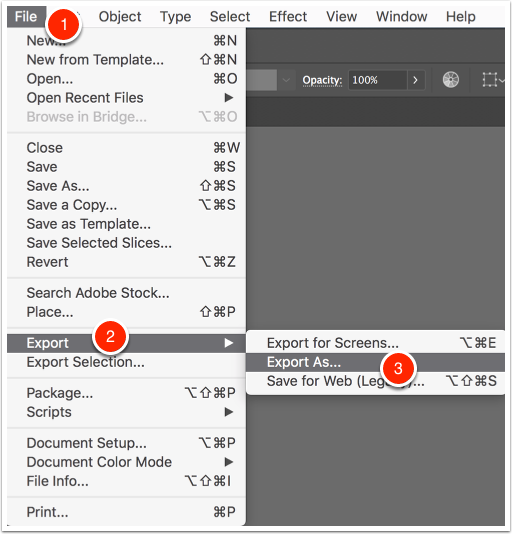
2.2. Export as SVG
- Select File
- Select Export
- Select Export As…
- Select the option to Use Artboards
Make sure that you export to place where you can remember.
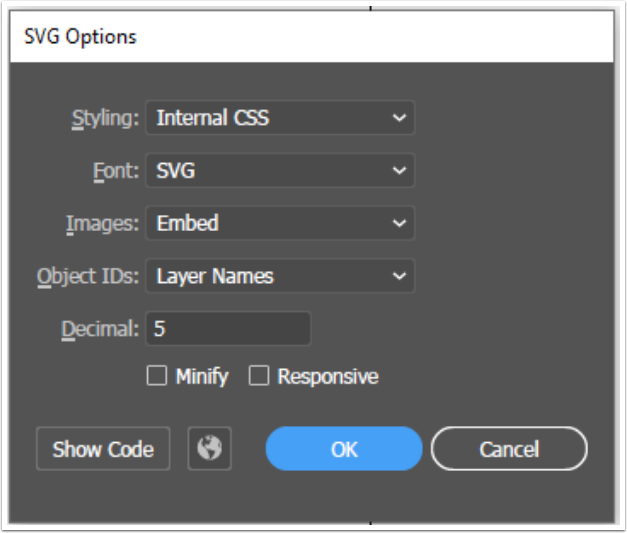
2.3. SVG Options
Make sure your export options matches the following
3. Upload SVG
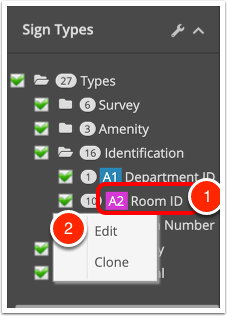
3.1. Find Sign
- Right click on the sign that you want to edit
- Select Edit
3.2. Match Fields
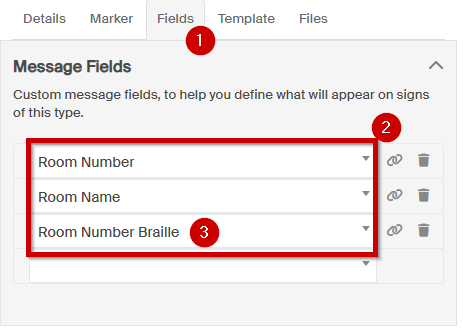
- Select Fields Tab
- Add Message Fields
- Automatic braille is handled a little differently - see this article for more info
- Save (not shown)
For more information on customizing fields, check out this article: Customizing Fields in Sign Types
3.3. Choose SVG Template
Note that fonts must be installed prior to uploading the SVG and must match the name exactly as specified in the SVG.
See Adding Fonts Tutorial.
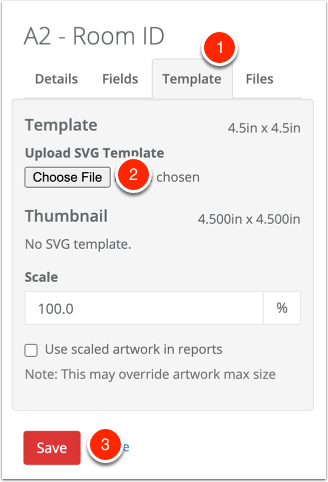
- Select Template Tab
- Press Choose File button
- Save
Once you save, if you come back to this tab, you'll see a preview of what the original template looked like, as well as a preview of one of your signs using your new template. This is a great way to confirm that things are working as expected
Getting an error? Check out this article: Font Upload Error