You're just my type!
You can create a new sign type by clicking on the wrench next to Sign Types in the sidebar and selecting "New Sign Type"

If you'd rather create a new sign type directly within an existing folder, right-click on that folder, and choose New Sign Type from that drop-down menu instead.
If you'd rather make a copy of an existing sign type, right-click on it in the left-hand sidebar, and choose "Clone"
Once you've clicked New Sign Type, you'll have a number of options to customize your new sign type.
1. Details
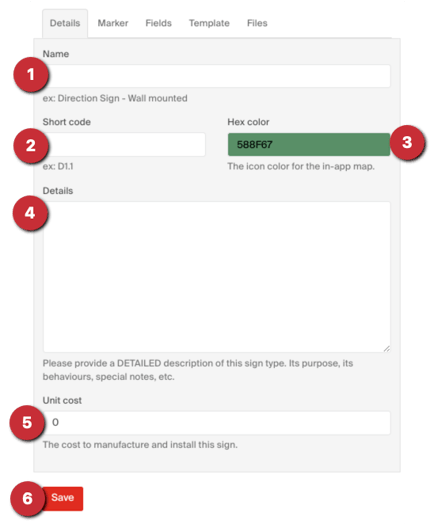
- Name - The Name or short description of this sign. For example, Large Wall Directional, Projecting Amenity ID, Conference Room ID With Slider, etc.
- Short Code - An abbreviated code for this sign type. This is what will be displayed in the sign markers on your location plans, and may also be used in reports.
- Hex Color - The colour that the markers of this type will be on your location plans. Note that the text colour will be chosen between white or black automatically, based on the colour choice.
- Details - This is any useful information about this sign type, including detailed description, mounting information, its purpose, etc.
- Unit Cost - The cost it takes to manufacture and install this sign, in dollars. This is also used in charts and reports to measure how the project is doing on its budget.
- Save - Once you're done making changes, make sure to SAVE before navigating away from this page.
2. Marker
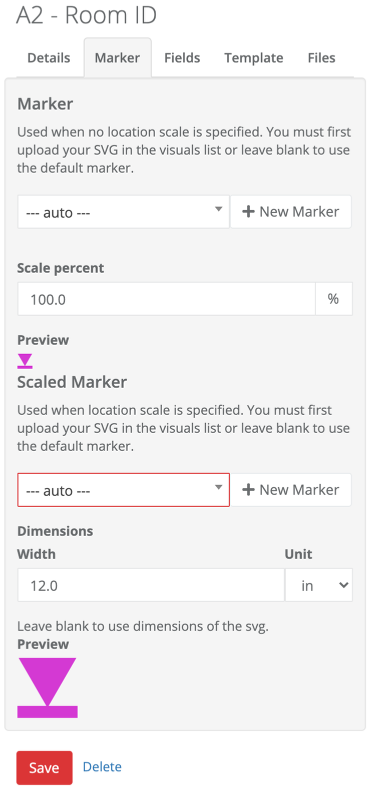
Here, you can choose your custom markers for this sign type, both for general markers and scaled markers specifically. For more info on this, check out Custom Markers
Note that Scaled Markers are only used on floor plans that have "Use Scaled Markers" selected
3. Fields
3.1. Message Fields
For much more detailed information on customizing fields, check out this article: Customizing Fields in Sign Types
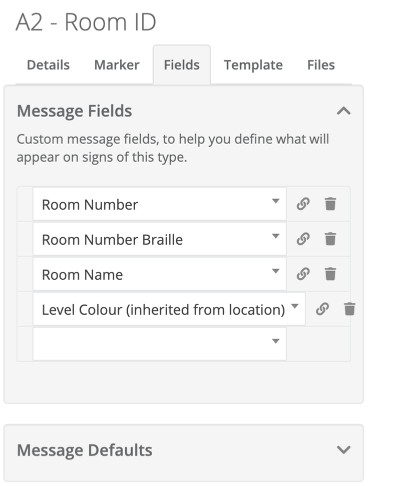
Message Fields - These fields outline the content of the sign itself, and can include things like Room Name, Room Number, Level, Pictogram, Stair Number, Parking Zone, etc.
Message Defaults - In here, you can set a default value for each of your message fields. This default value will be used automatically whenever a new sign of this type is created.
3.2. Repeating Message Fields

Number of Sides - How many sides does this sign have?
Repeating Message Fields - Repeating messages are used for signs that have multiple sides, rows, or columns that contain the same categories of information, like wall directionals, elevator directories, or donor walls.
3.3. Detail Fields and Replacements

Detail Fields - Fields to put information about the sign that doesn't necessarily affect its content or appearance. This could include fields for notes, dimensions, recommendations, defects, backing, or more.
Detail Defaults - In here, you can set a default value for each of your detail fields. This default value will be used automatically whenever a new sign of this type is created.
Replacements - This is a listing of how your field names should specified within the layer names of your SVG Templates, as well as in your customizable reports
Template
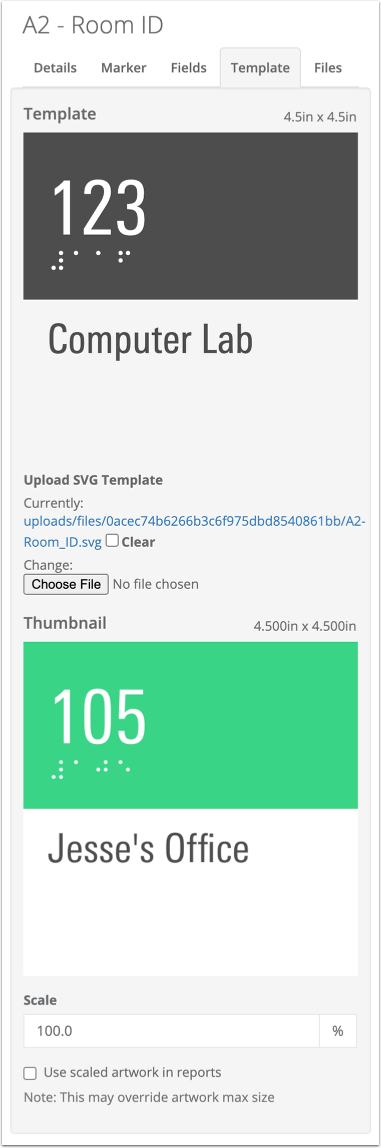
Template - Here, you'll see a preview of what your original sign template looked like in Illustrator, as well as the specified size.
Upload SVG Template - Here, you can see the file name of the uploaded template, and clear it out if you need to. You can also update it to a new version by clicking the Choose File button (and then clicking Save)
Thumbnail - Here you can see a preview of what one of your signs within SignAgent looks like using the template, and see what size it's appearing at within SignAgent
Scale - Here you can choose the scale that this artwork will use within your custom reports. Note that the scaled artwork may override the max size set up in the Document Setup tab, if it's larger than what is specified.
- Want more information on creating templates? Check out the tutorials on our website here: Templating
- Want to purchase specialized training for templating (or anything else)? Contact support@signagent.com
- Our team can also help you get started by creating some templates for you. If you're curious about that, contact support@signagent.com
Files
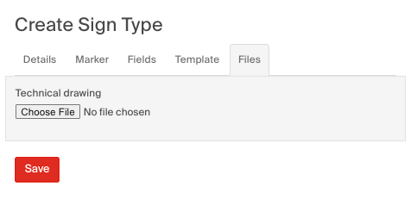
Here, you can add a technical drawing that will be exported if you choose the "Technical Drawings" option on the Export page. It doesn't do much else here, but it can be a useful reference point for your team.