"Look at this photograph!" - Chad Kroeger
1. Go to Export
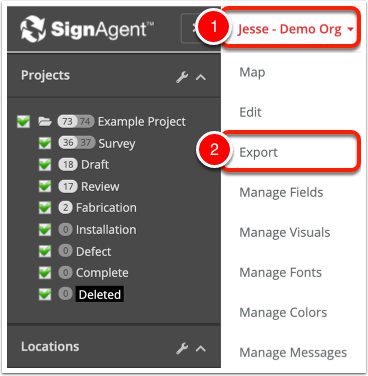
- Click on your organization name (near the top-left corner of your screen)
- Select "Export"
2. Set Preferences and Export
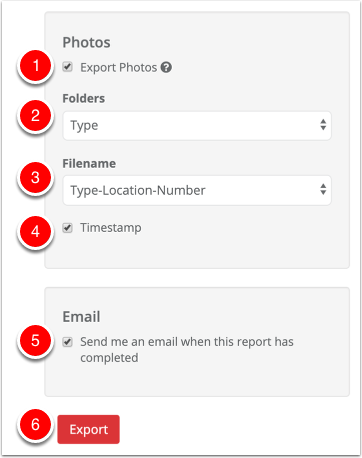
Firstly, make sure that the "Export Photos" box is checked to have them included in your Export. Then, select your preferences and choose "Export"
- Export Photos - If this box is checked, photos will be exported from this organization. If not, then they won't.
- Folders - Choose how these photos will be sorted into photos upon export. Your options are Type, Location, or "------" (None)
- Filename - Choose how these photos will be named upon export. This can help with sorting and identification after export. Your options are
- Type-Location-Number - For example: "A1-L1-001.jpg"
- Location-Type-Number - For example: "L1-A1-001.jpg"
- Timestamp - Choose if you want a date and timestamp included in the export or not. This will add that information to the end of the filename, for example: "A1-L1-001_2019-10-25_12.00.00"
This will be useful if you've taken multiple photos for a single sign, and want to know which came first. - Email - Choose if you want to be notified by email when this report is complete
- Export - Whenever you're ready, choose Export.
Note that, as always, your export is based on your visibility filters, search parameters, and review filters. It will only export sign information based on the signs that are currently visible or filtered on in this organization. See this article for more details: Sign Visibility Filtering