Brought to you by Flat Stanley.
This tutorial will teach you how to download and flatten a PDF to enable full compatibility with SignAgent. Please note some steps will differ slightly depending on the operating system you are using. These steps will be identified throughout the article.
Note: if you are uploading a brand new PDF file to SignAgent, open the PDF in Acrobat and skip to Step 3.
1. Edit the Location

Right click on the desired location and select "Edit".
2. Download Document to Edit
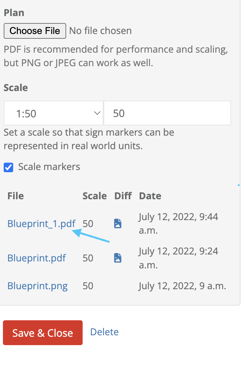
Select the pdf document you wish to flatten by clicking the hyperlink of the desired file.
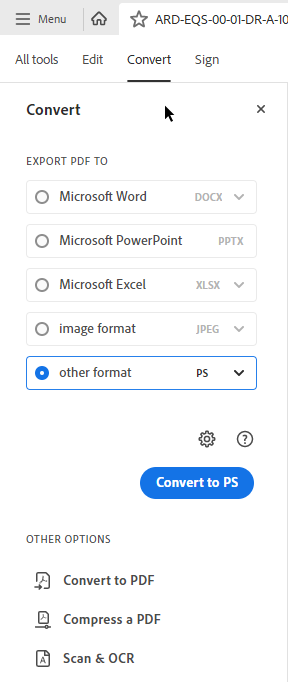
3. Export PostScript from Acrobat
Depending on your Adobe version, exporting a PostScript may differ.
OR
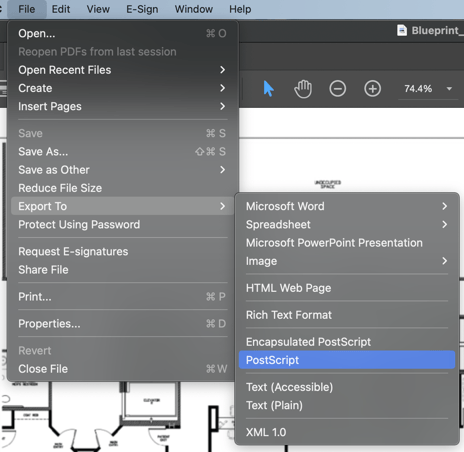

Open the downloaded file in Acrobat to begin the flattening process. Once opened, select File>Export> Export to PostScript
Once exported, close the original document.
Please note: the next few steps will look different depending on operating system.
4. Open the Post Script file with Acrobat Distiller
If you are using a Mac, right click on the file in your finder and choose "Open with", and choose Acrobat Distiller (If you do not have Distiller downloaded, you can find it in the Adobe suite). This will run in a separate window and re-save the floor plan as a PDF where it was saved previously. This happens automatically, no need to re-save it.

If you are using a PC, the script will physically run in a separate window - called the Acrobat Distiller. If this does not happen, you can right-click on the file and tell it to open with the Acrobat Distiller manually.

If you encounter an error dialogue box, simply close it, and the flattening process will proceed as intended.
6. Re-upload to SignAgent
In SignAgent, re-upload the flattened pdf document in the location destination.
As always, please make sure the scale of the new plan matches that of the old. If it is 0, leave the scale selection blank.
Complete! Your flattened PDF will now be ready for action.
Note: If you do not have access to Adobe Acrobat you can use free online tools like Pro PDF
You can upload and flatten a pdf directly to these tools - but please note they may not provide the same quality as the method explained above.
What Kind of Issues Can be Solved By Flattening?
-
Sign markers do not appear in exported plans
- Sign markers shifting position in exported plans
- Location plans won't render after being uploaded
- Location plans show a satellite map behind uploaded PDF plans