A tutorial on effective body language, in a manner of speaking.
This series will walk you through the basics of customizing reports in SignAgent.
This tutorial will show you how to adjust the body of your reports.
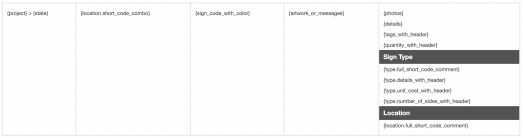
1. Body Structure
The body of your report will behave differently based on how many rows you include in the body. These adjustments can be made by right-clicking in the body of the report to add or remove rows.
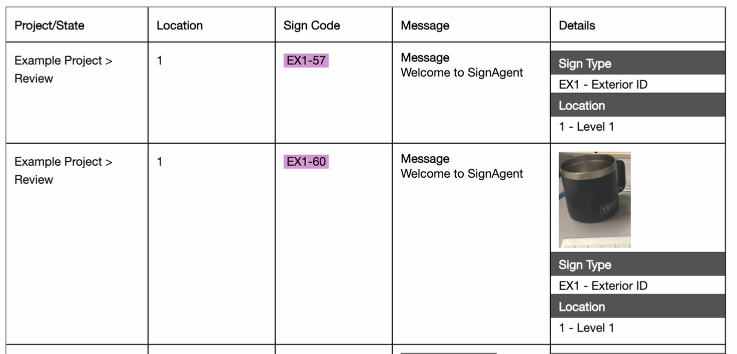
1.1. Body with 1 Row: Content Only
This will behave as expected, with each sign getting its own row. There will be no additional sub-headers, titles, or summaries beyond what's specified in your replacements.

1.2. Body with 2 Rows: Content with Headers

Adding a second row allows you to have Content Headers at the top of the body. These will appear at the top of the body section on every page.
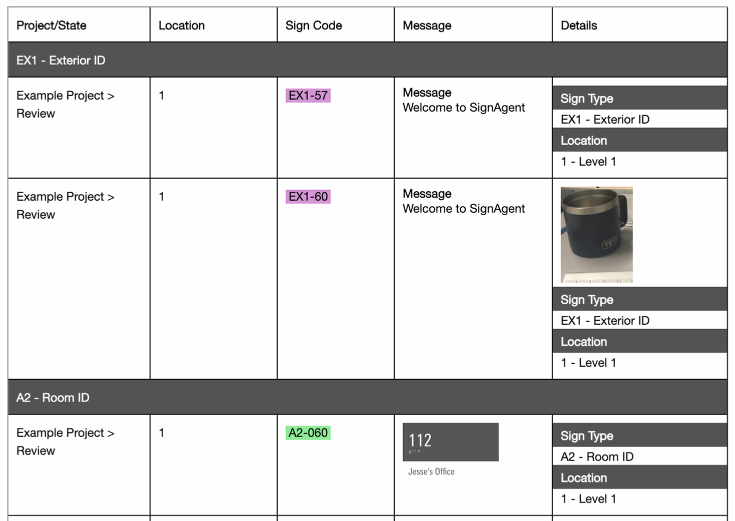
1.3. Body with 3 Rows: Content with Headers and Sub-Headers

Adding a 3rd row allows you to include sub-headers in your body. These will appear at the beginning of each sub-section, based on the first item in your sorting order. So, if you're sorting by Type/Location/Number, you'll get a sub-section for each type.
1.4. Body with 4 Rows: Content with Headers, Sub-Headers, and Summaries

Finally, adding a 4th row allows you to add a summary row to each sub-section. Most typically, this is used to calculate total quantities or costs for a sub-section.
