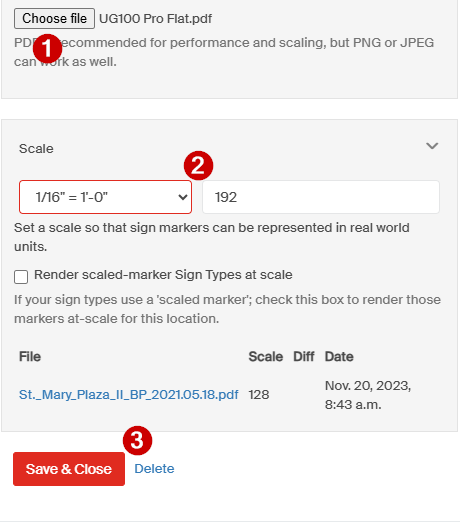
Economies of Scale
Know the scale of your location plans? You can now put that into SignAgent for all sorts of useful features, including in-app distance measurements, real-size sign markers, and more!
Add Scale to New Location Plan
If you are creating a brand new location, this is the workflow to add a scale factor to it.
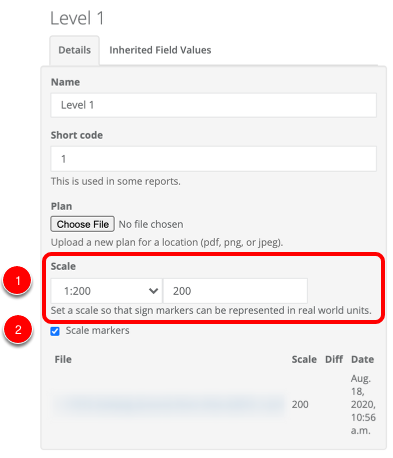
- Set the scale for your floor plan. You can choose from one of the options in the drop-down, or you can add your own.
- You can also choose whether or not to Scale Markers.
- If this is selected, then markers will use the markers and sizes set out in the "Scaled Markers" section of the "Markers" tab for each Sign Type. See more info on that here: under section 3.1 Scaled Markers
- If this is not selected, then signs will scale up and down based on your zoom level, just like they usually do.
Want information on the Measurement Tool? Check out the article here: Measurement Tool
Add Scale to Existing Location Plan That Doesn't Have a Scale
If a location has been created and signs have been plotted on it already, the workflow is slightly different. There are safeguards in SignAgent to prevent users from irreversibly disconnecting the scale factor of signs from the location plans they are connected to. This workflow is designed to allow you to add a scale factor to a location without risking that outcome.
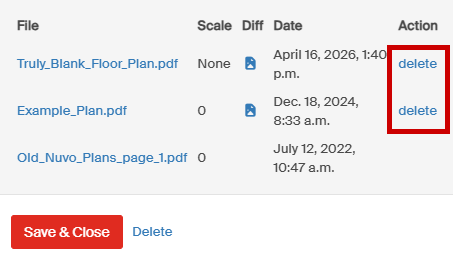
- Delete every location version except the originally uploaded plan. It's okay if this plan is long out of date since it will only be used momentarily.
- Add the correct scale to the original plan and save.
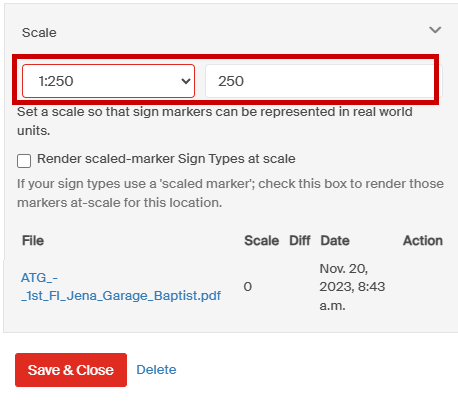
- Select the new floorplan, choose its correct scale, and save.