If you've got some experience with Active Directory, you can probably just SCIM through this one.
Interested in provisioning your groups and users in SignAgent using SCIM? This tutorial will walk you through the steps of how to how to set this up using Microsoft Azure Active Directory.
1. Go to Enterprise Applications
- First, head into your Microsoft Azure account (portal.azure.com), and choose Azure Active Directory from the menu in the top-left corner of your screen.
- Next, choose Enterprise Applications from the new menu in the top-left corner of this screen.
- Alternatively, you can use this URL: https://portal.azure.com/#blade/Microsoft_AAD_IAM/StartboardApplicationsMenuBlade/AllApps/menuId/
- Here, you'll see the list of active enterprise applications available to your organization. If you already see SignAgent in here, you can skip straight to Step 3.
2. Add New Enterprise Application

From here, if you don't have the SignAgent application already set up, choose "New Application"
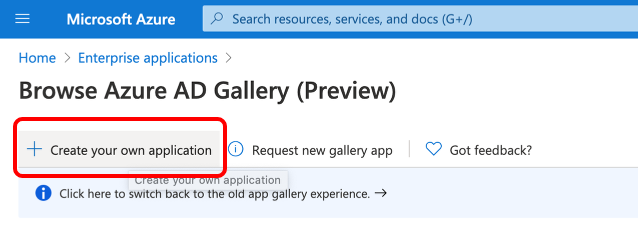
Next, choose Create Your Own Application
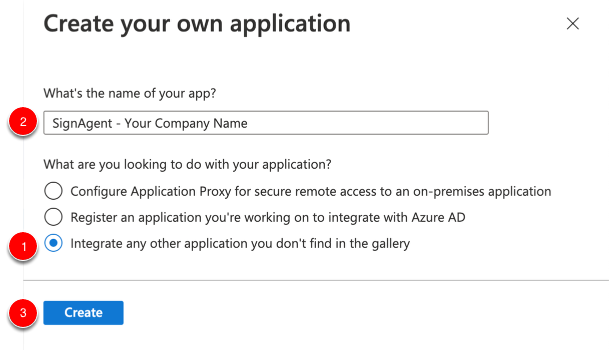
A slide-out window will appear on the right of your screen. Here, choose "Integrate any other application you don't find in the gallery", give it a logical name, and choose Create.
A loading icon will appear in the top-right corner of your screen, and should indicate success after a few seconds.
3. Set up SignAgent Application

You should now find yourself on a summary page for your new enterprise application. From here, click on Provisioning in the left-hand sidebar, and the choose "Get Started"
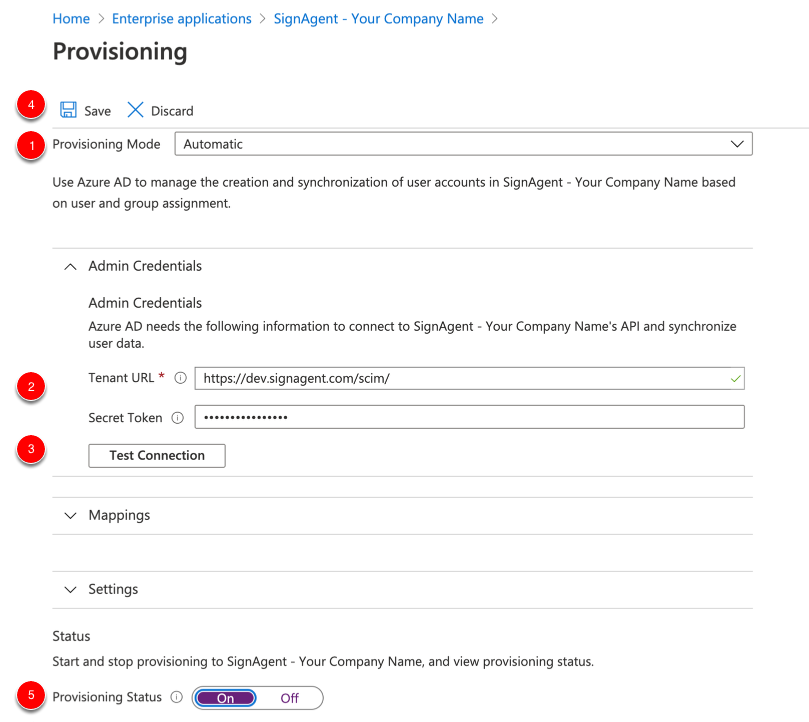
- Set Provisioning Mode to Automatic
- Add your Admin Credentials
- These should have been sent to you from your Account Manager at SignAgent
- Choose "Test Connection" to ensure the credentials are correct. You should get a notification in the top-right corner of your screen indicating success or failure.
- If it fails, please reach out to support@signagent.com
- If it succeeds, click Save.
- Before leaving this screen, set Provisioning Status to "On" and then Save one more time.
4. Add Users and Groups
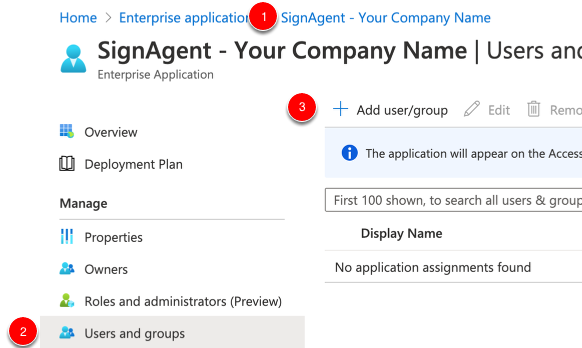
First, head back to the main page for your Enterprise Application by clicking on your Application's Name near the top of your screen. Then, select Users and Groups, and choose "Add user/group"

From here, add your Users and/or Groups that you want to have access to SignAgent, and choose Select.
Once you've selected them all, click "Assign." You should see a success notification in the top-right corner of your screen. It should now redirect you back to the Users and Groups page, and you'll see a list of users and groups that have been assigned.
7. Run Provisioning Cycle

Finally, go back to provisioning. If your current cycle status displays the accurate amount of users, then you're good to go. Otherwise, click "Start provisioning" and Azure will provision the appropriate access to SignAgent for your users and groups. Note that, by default, Azure will run a provisioning cycle every 40 minutes, so if you forget this step, it will still happen within that timeframe
If you want to see more info about when each user was provided access, you can click "View provisioning logs"
8. Complete!
Your users should now be able to access SignAgent as normal, either by
- Going to office.com, and choosing SignAgent, or
- Going to app.signagent.com and logging in using the "Sign In with Microsoft" button.