Haven't you already read this article? Oh yeah, it's a repeat.
Resources
Height Template
Repeat Alignment Template
Complex Repeat Alignment Template
Height
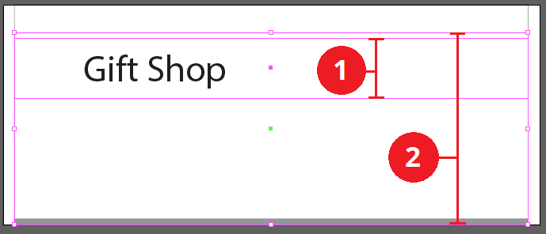
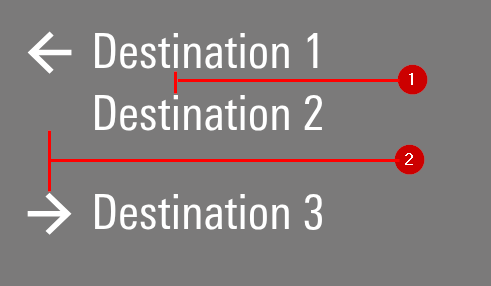
Height controls are the easiest kind of spacing that a repeat can have. It consists of a sizing box (1) whose edges determine when the next repeated elements will start. Once the template has finished drawing the first line (in this case it's Gift Shop) it will find the edge of the height box and start drawing the next line. It will keep doing this as long as there is more content and and another height box can fit inside of the larger bounding box (2).

This method should be used when a sign only requires one kind of spacing. It's easy but cannot differentiate between different elements and cannot support more complex signs. For that we need....
Varied Spacing Methods
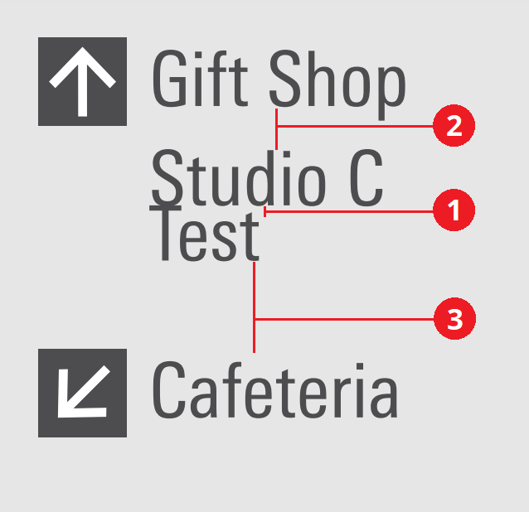
In the sign below you can see that there are three types of spacing. These are the spacing. They are
1. The space between 2 lines of text
2. The space between destinations
3. The space between directions
Please note that these dimensions are exaggerated for educational purposes. SignAgent cannot be held responsible if you decide to emulate these design choices in your own work.
1. Leading
When text overruns a single line, we use leading commands to determine the spacing for the second line. In this example we type add "leading: xxx" to our text's bounding box commands after any alignment commands. 
For a more in depth article on this process please read Multi-Line Templates and Leading.
2. Alignment
Alignment in a repeating template has slightly different syntax than regular alignment. The reason is that SignAgent needs to render all of the elements of the initial drawing before you can start aligning subsequent repeats to them.
If you want to learn about that regular alignment, please see this article.
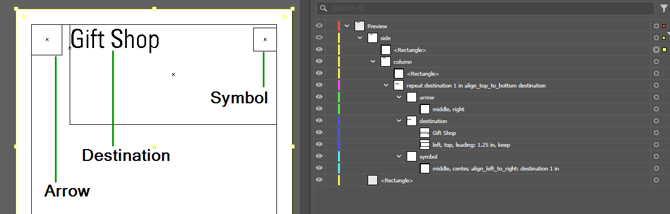
To set up repeat alignment, we'll need to add it to the repeat layer. The command used in this example is:
"destination 1 in align_top_to_bottom destination"
Think of this like an equation. Everything on the left of the "align_top_to_bottom" command is what is being drawn, and everything on the right is what that drawn object is being aligned to in the repeat above.
So for this example, when the system goes to draw a new destination, it looks for a destination in the repeat above, and aligns the top of the new destination to the bottom of the last destination, and adds 1 inch of space.
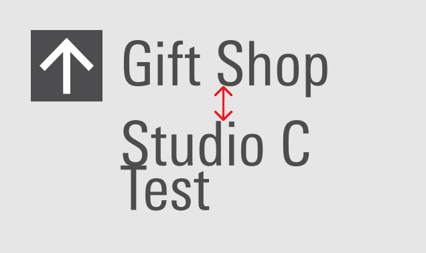
This creates the effect in the example below where each new destination listed will have a 1 inch space between the one before it.
3. Layered Alignments
So now, how do we create a sign where:
1. Different destinations in the same direction have one size of spacing
2. New directions have a different spacing
The answer is layered alignments!
Adding to the previous example, we'll update our repeat alignment command to:
"repeat arrow 2 in destination 1 in align_top_to_bottom destination"
Translation: draw any "arrow" (on the left of the command) with a 2 inch space between the top of itself, and the bottom of the last destination (on the right of the command), and draw any destination with a 1 inch space between the top of itself and the bottom of the last destination.
All objects being drawn in this example are only "looking for" or "aligning to" a destination, since that is the only thing on the right hand side of the equation. But you can add more objects for the system to align to on the right of the command to add more complexity if needed.
You can add as many if-then layers of alignment to a template as you'd like, however they tend to quickly grow more complicated as we add different layers and options.
When we combine this all together we end up with the very first image of a sign. Leading will control the spacing when text runs over a single line (1). If an arrow is present it will be given a 2 inch space from the last destination (3). If no arrow is present, the destination will be given a 1 inch space from the previous destination (2).
-4.png?width=516&height=377&name=image%20(1)-4.png)