1. Find the project
From the dashboard you can:
- Filter to survey projects
- Search for a project by name
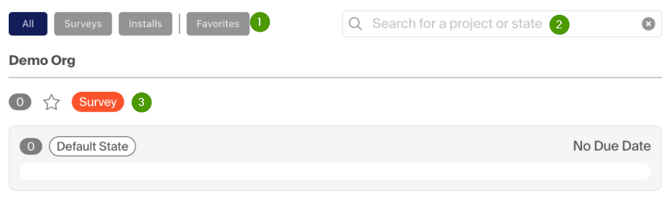
3. Once you've found the project, click on the orange button to open it
2. Select the location
You will be presented with a list of locations to select. If folders are used to group and organise location plans, they will display with the same structure they do on the web. The grey number lists how many signs you have access to install on each plan.

Both the folders and the location plan are searchable. Searching for a folder's name will display all the content contained within that folder. 
Searches are remembered. The app will display the search and results after a user exits a plan. This can be an easy way to navigate through a group of plans like the floors of one building that may otherwise be at the bottom of a long list.
3. Navigate
Using pinch to expand and drag to move, find where the sign you're about to photograph is located on the blueprints/map. Zoom in to help with placement. Whichever direction is facing upwards on the map will be where the direction of the sign. Orienting the map in the same direction you are facing will help keep your bearings and ensure the signs are oriented correctly.
4. Place a Sign
Tap and hold on the spot where you want to create a sign. If you have enabled, the camera to open automatically it will do so. If you haven't, see this article on how to enable this feature.
5. Capture Photos
Take the photos. You can take more than 1 and how many will be uploaded is tracked by the number in the camera button (1). When you've captured everything required, select "Done" (2).
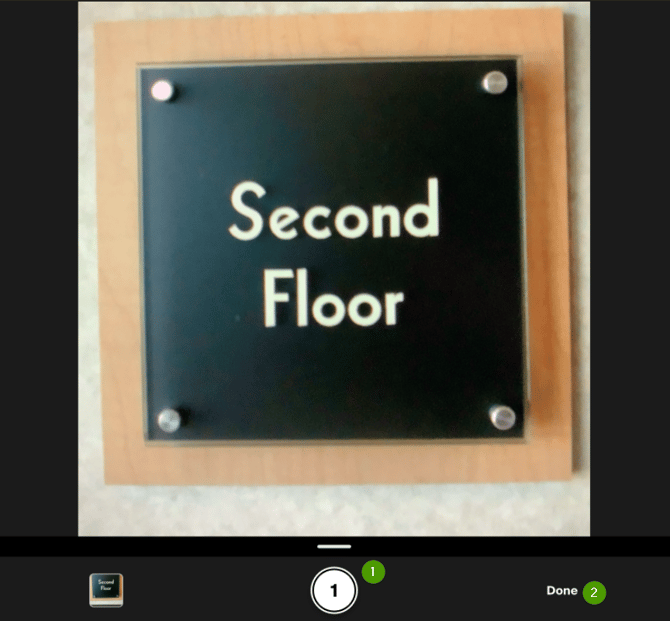
The best order for photos is as follows:
1. Context photo of the sign and it's surroundings
2. Details - optional depending on the sign but can include specific sign ID numbers, mounting photos, or other non-artwork details
3. Close up photo including just the content of the sign
You have now captured enough information for most surveys. Tap the map to close the sign and move on to the next sign. The features below are extra ways of navigating and editing signs.
Edit Content (Info Panel)
It is possible to add extra more information while on site but often isn't necessary. Categorising sign type, adding content, or noting condition can all be done more easily from the desktop after the data has been synced and is the recommended best practice when surveying.
The only exception is if measurements need to be logged on site.
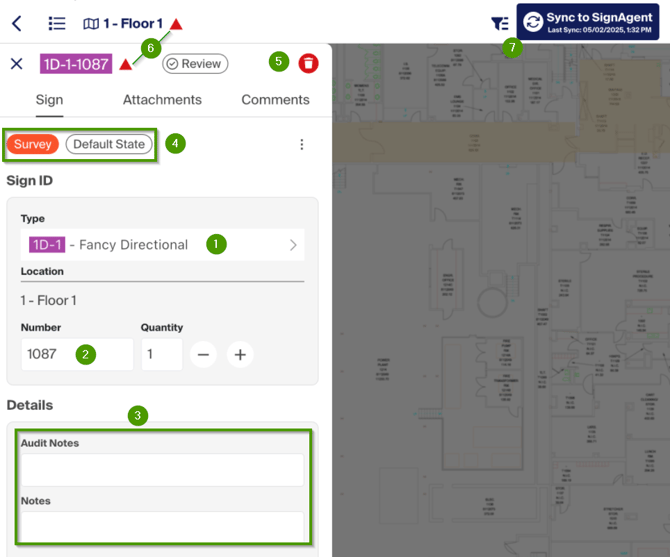
1. Sign Type - Select from pre-created list of sign types
2. Number - The number is an automatically generated identification number. It can be edited if specific numbers are required
3. Fields - If custom information fields have been created for this sign type, they can be added to or edited
4. Project & State - For more information on projects & states, check out the video on them in this article
5. Delete the Sign
6. Out of Sync Data - This red triangle lets you know that you've added data to the sign that hasn't been synced to the cloud yet. This is okay and will be handled by performing a sync at the end of your work
7. Sync Button - Lists the time of the last sync and pressing it will start a new one. It is unnecessary to use this button except at the end of the survey or day of surveying
Tapping the map will close this sign info panel. Tapping on a sign marker on the map will open the following buttons at the bottom of the screen.
 1. Delete Sign
2. Reopen Info Panel
3. Capture Additional Photos
Comment
It is also possible to leave comments or see/remove photos that have been attached to the sign.
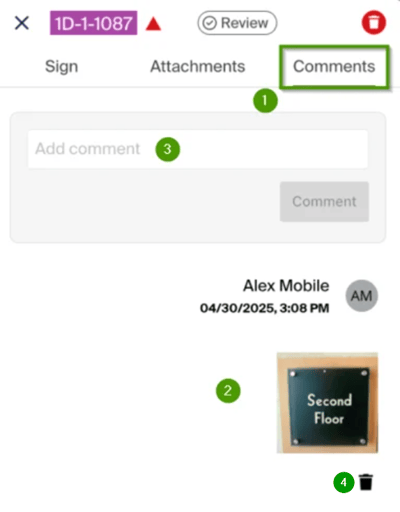
1. Comments Tab
2. Previous Comments - View captured photos or click on the trashcan to remove it
3. Leave Comment - Leave a comment about this individual sign
4. Delete Photo - Delete photos you have already captured
Rotate & Move
After tapping on the map to close the sign, tap the sign marker to bring up the rotation wheel. Rotate the wheel to rotate the orientation of the sign.

Press and hold on the sign marker to open the movement box. This allows the sign to be repositioned.

Sign List
Press the list button in the top-left corner to see a list of signs that have been captured on the current location.
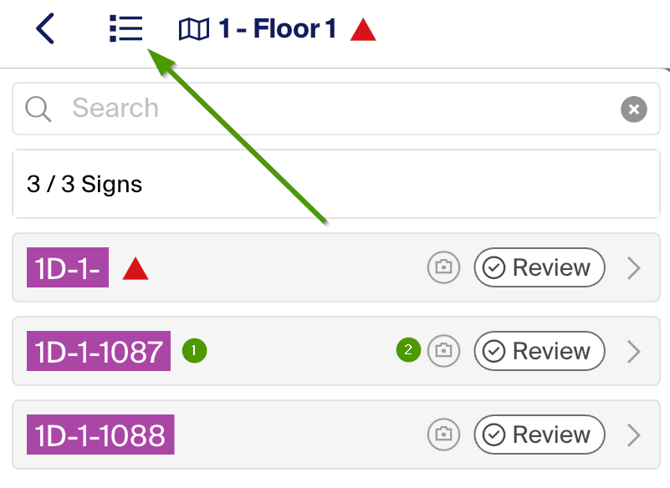
1. Sign ID - Tap on the sign ID to open the Info Panel for that sign
2. Photos - Icon signifies that a photo has been captured for this sign