Using Custom Artwork
Got a unique sign that doesn't quite fit your template? Want to add just a little more kerning to that one sign? This tutorial will show you how to add custom artwork to individual signs in SignAgent™.
Upload Custom Artwork

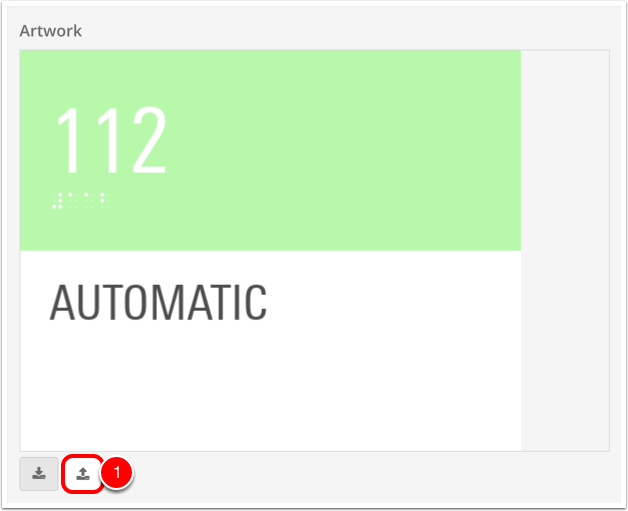
Adding your own custom artwork is easy! All you have to do is choose the Upload PDF button, in the artwork section of every sign. Once you've chosen your file, you'll end up with an artwork section that looks a little bit like this:

The artwork that you just uploaded will now overwrite the automatically created sign artwork, and will be displayed in all areas of the application, including the expanded sign list, PDF Message Schedule, PDF Sign Artwork download, and sign hover.
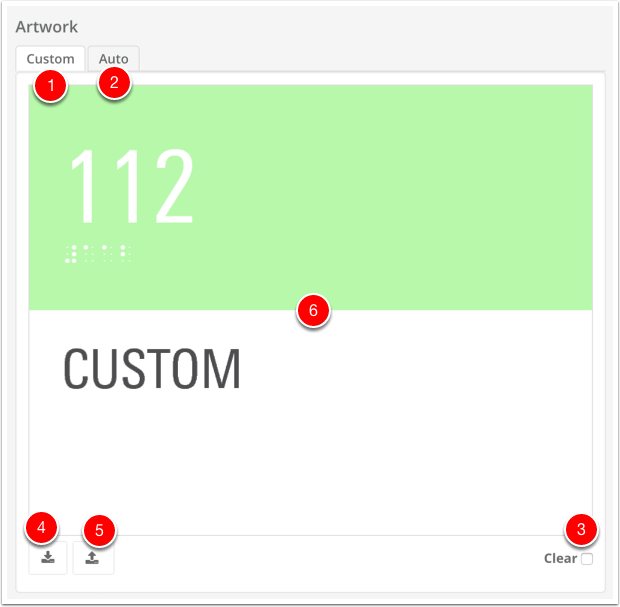
Here's a quick overview of what you'll see after uploading your new PDF:
- Custom tab: Clicking this will show you the newly uploaded custom PDF artwork.
- Auto tab: Clicking this will show you the automatically generated sign artwork, if there is any. NOTE that clicking this tab will not remove or replace the uploaded custom artwork, and it will not make the automatically generated artwork show up anywhere else in the application or reports.
- Clear button: This button will clear out any uploaded custom PDF artwork.
- Download PDF: This button will allow you to download this single sign's PDF.
- Upload PDF: This button will allow you to upload new custom PDF artwork
- This is your artwork. It looks great.
One more note...
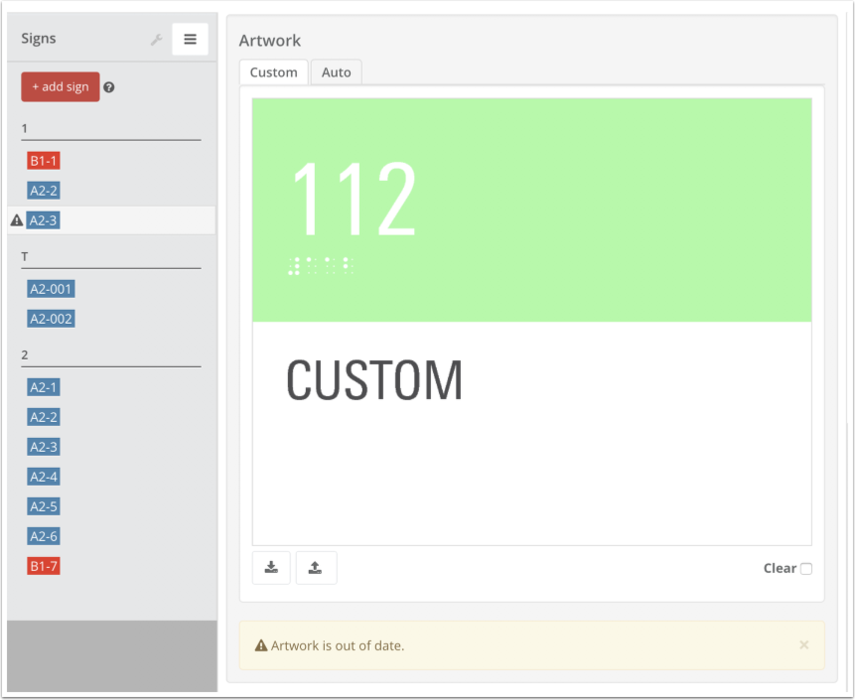
Note that if you make changes to the messaging in your sign, you'll get a notification that your custom artwork is now out of date. This notification will also show up in your sign list.
To get rid of it, just upload a new piece of custom artwork so that things match up nicely again. Or even just upload the same piece of artwork again. Either way, the notification will go away once you replace the out-of-date artwork.
