Repeating Fields (Create a Simple Directional)
Learn how to create a sign with repeating elements
You will need Adobe Illustrator (CC or newer) to create artwork templates.
You can also use the B1-template.ai template as an example file.
1. Create the Sign
Draw the sign the way you always did then follow the instructions below to create dynamic sign templates using SignAgent.
You only need to draw the first line of the multi-line
- Move everything to one layer and call it "Sign" or "Preview"
- Create a nested layer called "Side" and create a no fill / no stroke rectangle the size of the sign to define the outside border.
- Create a nested layer in "Side" called "column"
Create a no fill / no stroke rectangle to the size of the box to create a "track" in which the repeating element will repeat. This will define the area that the repeats can occur in.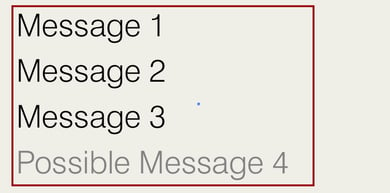
- Create a nested layer in "column" called "repeat"
whatever elements are in the folder will be repeated. Whatever is contained in the repeat sublayer will contain the possibilities for each line. In the example immediately below each line of the repeat could contain an arrow, a message, a symbol, or any combination of these.
- Create a nested layer in "repeat" called "height"
Create a no fill / no stroke rectangle to the size of the box. The height of the rectangle is used to step and repeat the repeating element. - Create a nested layer for each field in "repeat" that you want to be dynamic.
- Create a nested layer called "arrow"
Create a no fill / no stroke rectangle to the size of the box
Rename the rectangle using alignment commands. One of (left, center or right) and one of (top, middle or bottom) - Create a nested layer called "destination"
Move text into that sub-layer
Create a no fill / no stroke rectangle to the size of the box to be filled
Rename the layer using alignment commands. One of (left, center or right) and one of (top, middle or bottom) - Create a nested layer called "symbol"
Create a no fill / no stroke rectangle to the size of the box
Rename the rectangle using alignment commands. One of (left, center or right) and one of (top, middle or bottom)-1.png?width=450&height=333&name=2024-04-02%2008_04_00-B1-template.ai_%20@%2033.41%20%25%20(CMYK_CPU%20Outline)-1.png)
- Create a nested layer called "arrow"
Horizontal Repeat
To repeat horizontally instead of vertically change "top_to_bottom" to "left_to_right" or "right_to_left"
- column is used to specify the location and extent where the repeating element can repeat. If there is more than one element use column_1, column_2 etc.
- repeat is used to specify the elements that should be set and repeated.
- height is used to specify the height of the repeating element and is not required if you use more complex spacing commands. Learn more here.
- Field Name "Room Number" = Layer Name "room_number"
2. Exporting Signs
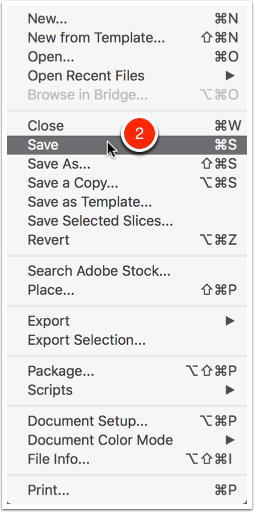
2.1. Save sign
- Select File (not shown)
- Select Save
Make sure that you save it in a place where you can remember.
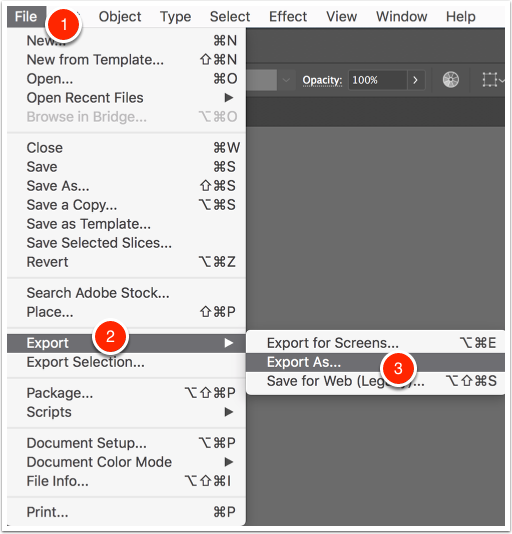
2.2. Export as SVG
- Select File
- Select Export
- Select Export As…
Make sure that you export to place where you can remember.
2.3. SVG Options
Make sure your export options matches the following
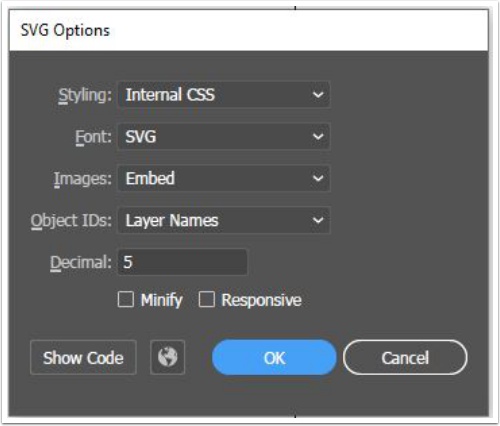
3. Upload SVG
3.1. Find Sign
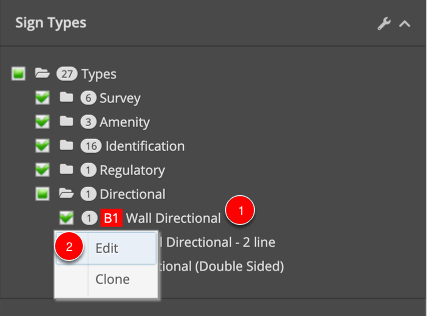
- Right click on the sign that you want to edit
- Select Edit
3.2. Match Fields
Note that in this example, the Message Fields section is completely blank, since we're only using Repeating Message Fields.
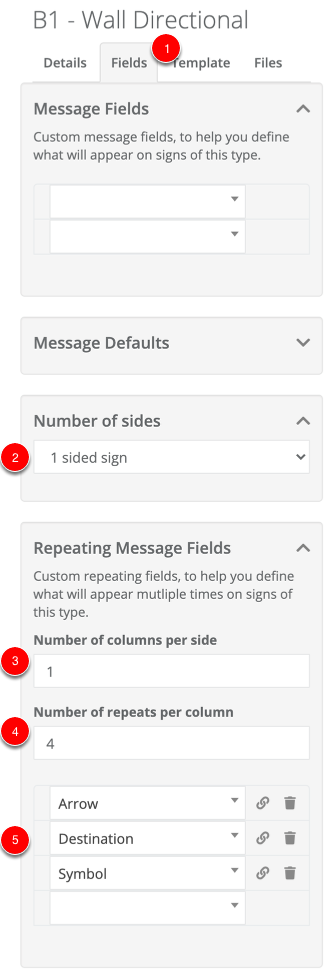
- Select Fields Tab
- Choose Number of Sides
- Enter Number of Columns
- Enter number of repeats/rows per column
- Add Repeating Message Fields
- Save (not shown)
3.3. Choose SVG Template
Fonts must be installed prior to uploading the SVG and must match the name exactly as specified in the SVG.
See Adding Fonts Tutorial.
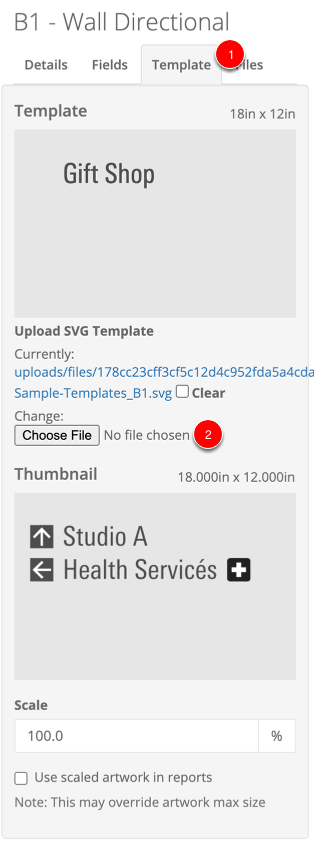
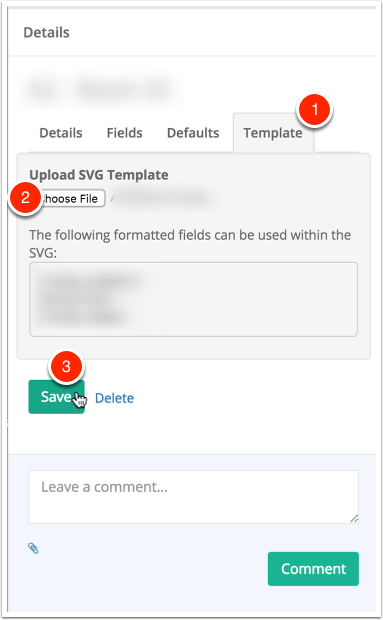
- Select Template Tab
- Press Choose File button
- Save (not shown)
Note that once you've uploaded your template here, you'll also see a preview of one the signs from your organization, so you can easily see if the template is appearing as you expected.
