Fabricator Script
Fab-ulous!
This article will show you how to effectively use SignAgent's exported artwork for fabrication, using the new Illustrator Script
The examples in this script are using signs created using the Simple Room ID template (with level colour added). You can also use the signs in the attached folder for example.
1. Download and Install the Script
You can find the SignAgent Fabricator script on the Adobe Exchange, or by using the link here:
https://exchange.adobe.com/creativecloud.details.106249.signagent-fabricator.html
Note that you'll need an active Creative Cloud Subscription to install this script, and it's compatible with Adobe Illustrator versions 25.0 and higher.
2. Download your Sign Artwork
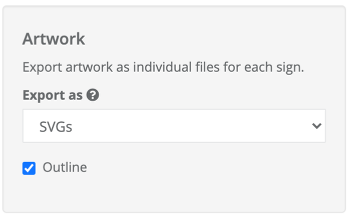
From SignAgent, export your sign artwork as SVGs. You can choose to outline text or not, both will work.
For more info on Exporting, see here: Exporting Reports
3. Run Script in Illustrator
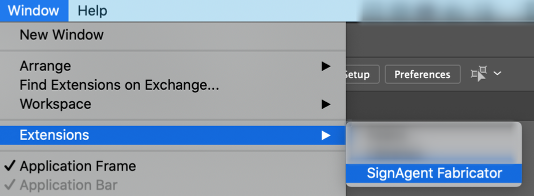
Once the script has been installed, you can find it under Window > Extensions > SignAgent Fabricator
Upon running it, you'll be asked to log in using your SignAgent credentials, and choose a folder with sign artwork in it.
You'll likely get the best results by choosing a folder with artwork for only a single sign type, but multiple sign types can work as well.
4. Choose Script Preferences
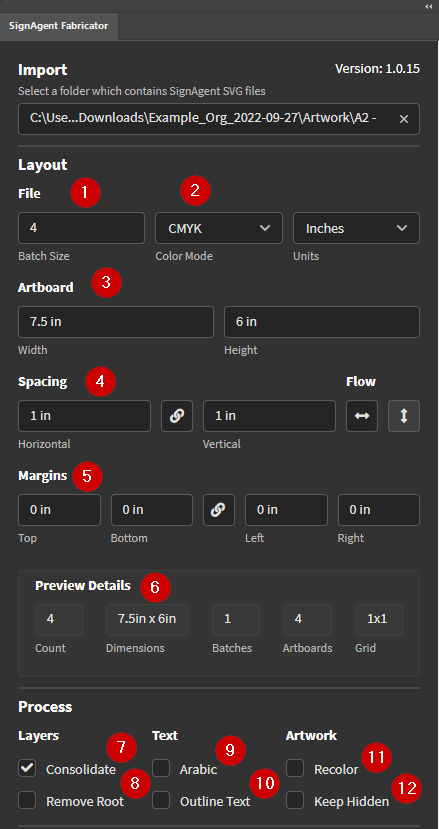
Here you can set the preferences for how you want these pieces of artwork laid out in Illustrator.
- Batch Size - Determines the number of signs per file. It will be the same number as the signs imported by default. If you were importing 30 signs and wanted 15 per document, the batch size would be set to 15.
- Color Mode - Swaps between using CMYK and RGB color schemes.
- Artboard - Here you can set up the size of each artboard, which can match the size of the substrate being used, or whatever size you want.
- Spacing - Here you can set the spacing between each piece of artwork, within the artboard.
- Margins - Here you can set the internal margins for each artboard (the spacing from the edge of the artboard to the outermost signs)
- Preview Details - As you update the values above, the numbers here will update dynamically.
- Count - The pieces of artwork being rendered
- Dimensions - The dimension of each piece of artwork
- Artboards - Based on the settings above, how many artboards will be required
- Grid - How the artwork will be laid out on each artboard.
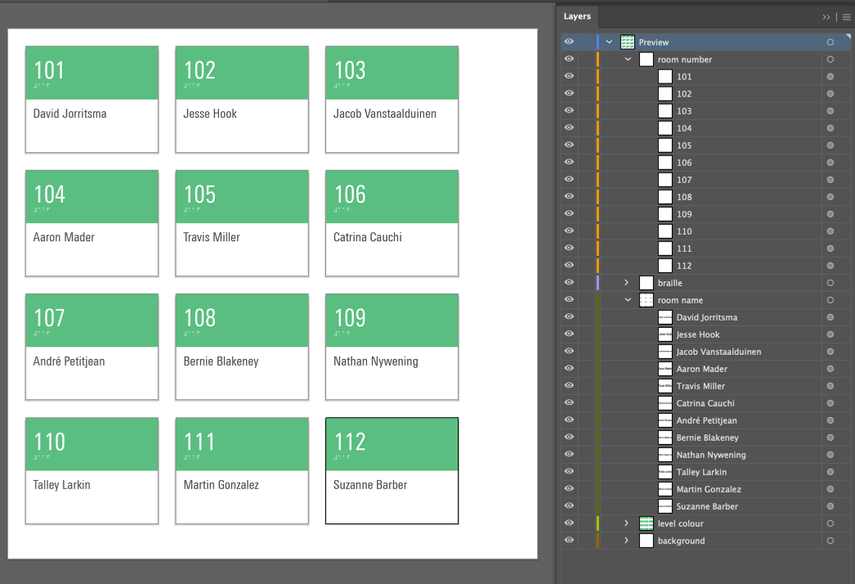
- Consolidate - This option will be checked by default. It will combine all layers with the same name into a single layer. This is visible in the completed image in step 6. All room_number and room_names have been consolidated into their own layer.
- Remove Root
- Arabic - Allows Illustrator to handle Arabic scripts and font logic.
- Outline Text - Outlines any editable text when working with un-outlined SVGs
- Recolor - Allows the user to use custom color libraries to recolor sign elements
- Keep Hidden - If this box is checked, it will keep the no fill, no stroke boxes (bounding boxes, column, height, etc.) in the artwork.
5. Export Settings
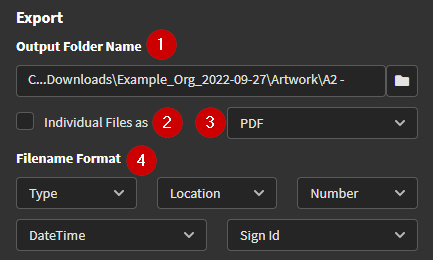
- Output Folder Name - Select the destination to save newly created files
- Individual Files - If this box is checked, each sign artwork will save individually rather than as a single document
- File Format - Select the format of saved artwork
- File Naming - Dropdowns allow for customising the naming structure of the saved artwork files
6. Complete
Complete! Once this is done, the artwork will be rendered into artboards, ready to be run through your production processes. You'll also note that all layers have been consolidated, so if you need to make any changes to colouring or other aspects, you should be able to do that quickly and easily too.
