
Fields are the most important part of the sign type creation process. They determine what information is tracked and how for every type of sign.
Webinar - What fields should you create?
This webinar explains how to break down a sign type's information and create the necessary fields.
Creating the Fields
1. Access The Fields
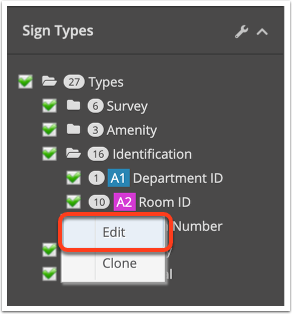
Right-click the sign type that you'd like to change in the left sidebar, and choose Edit.
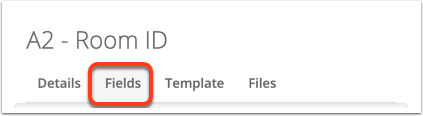
Next, select the Fields Tab. From here, you can customize the types of fields that will appear in your sign dialog. There are a few different areas in here:
2. Edit Artwork Fields - Message Fields
Message fields typically represent content that will appear on a sign's face. This may include things like Room Name, Room Number, Braille, Symbol, Colour, Elevator Number, Building Name, or really anything you want.
All new fields, by default, are short text fields. If you need a different format, like colour, images, text with line breaks, multiple-choice options, or others, you can edit the type of field. See more details here: Manage Fields: Different Field Types
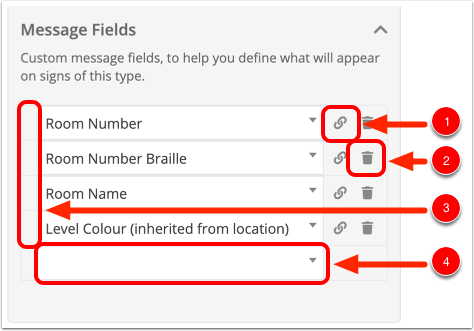
- To see attributes about this specific field or change the field type, click on the link icon.
- To delete a field, just click the trash can.
- To rearrange the fields, use the grey "grabber bar" at the left edge of each field name.
- To add a field, simply click a blank entry in the list, and choose a label from the drop-down list. If your desired label doesn't exist, type it in.
If your drop-down list has a lot of options, you can search through them by starting to type into the field here.
Message Defaults
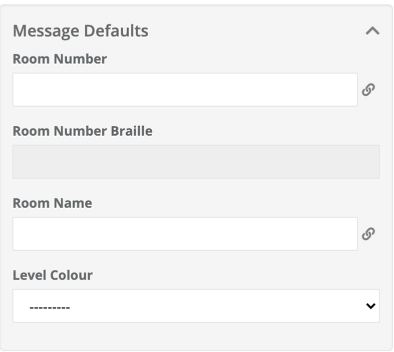
This area allows you to set default messages for your fields, so that any time you add a new sign, it will already contain this default information. The information can be overridden for an individual sign but will be present automatically. This can be really useful for frequent messaging, standard colour schemes, or typical backgrounds.
Number of Sides
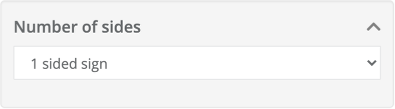
If your sign has more than 1 face, you can specify that here. This will also adjust the icon on your location plans.
If a multi-sided sign has different messaging on each face, repeating fields will be required. Learn more in this article: Repeat Message Fields
See this article for more information on how to set up a multi-sided sign.
Repeating Messages
Repeating fields are used when the same information shows up more than once on a sign's artwork. This could be a directional pointing to multiple destinations, a directory, or road sign with multiple pictograms.
The four questions to ask when creating these fields are:
1. How many sides does the sign have?
2. How many columns of information are on each side? Think of an elevator directory with multiple columns of names.
3. Within each column, what is the maximum number of rows (or repeats)?
4. Within each row, what are all of the elements that could exist
The example below is a overhead directional that has:
1. Two sides
2. Two columns per side (a left column and a right column)
3. Two maximum repeats per column
4. An arrow, destination, pictogram, and background color as possible content for each repeat
5. A "Header Zone" field that is the same on both sides of the sign and so only needs to be entered one time and is therefore not a repeating field. 
The interface will then look like this.

Here is an example of artwork generated from this interface.

This article on repeating fields has even more information and explains how to create artwork templates with these fields: Repeating Fields
Detail Fields
Detail fields are places to put information about the sign that doesn't necessarily affect its content or appearance. This could include notes, dimensions, mounting, a project PO number, the date of the next maintenance, or anything else you can think of.
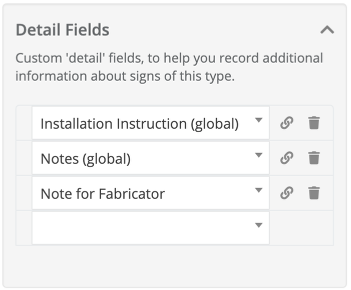
Note that there are also Detail Defaults which behave the same way as Message Defaults.
Don't forget to save when you're done!