Different strokes for different folks!
Want to have custom, dynamic colouring for shapes or symbols in your templates? This article will show you how!
1. Set up Illustrator Template
A2-Room_ID_dynamic-color-shapes.ai
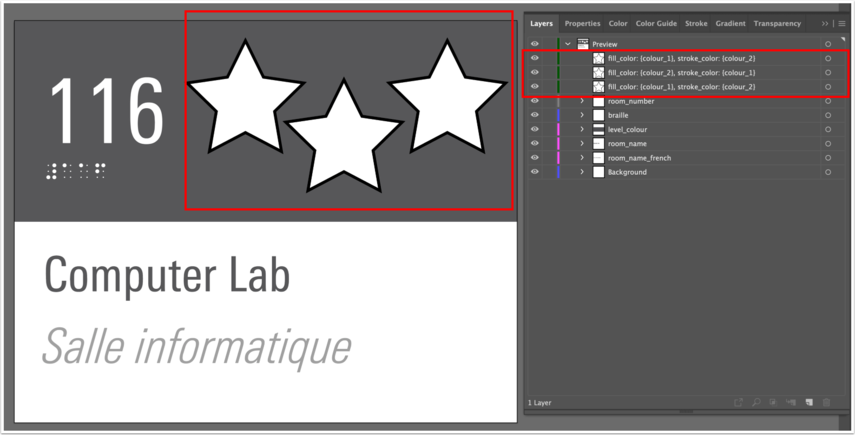
In this example, I've added some stars to the header, which will be dynamically coloured based on whatever I choose for that sign within SignAgent.
To add this functionality, use the following naming convention for the shape names:
fill_color: {COLOUR FIELD NAME}
stroke_ color: {COLOUR FIELD NAME}
In this example, my field names are called Colour 1 and Colour 2, so the shape names for the 1st and 3rd star is
fill_color: {colour_1}, stroke_color: {colour_2}
Note that the second star is reversed, so it has
fill_color: {colour_2}, stroke_color: {colour_1}
These commands will work for all shapes, including rectangles, ellipses, rounded rectangles, stars, and polygons. Note that if you apply these commands to a line, only the stroke colour will be applied.
For more information on how to properly set up your layers in this template, check out this article: Create a Simple Room ID Template
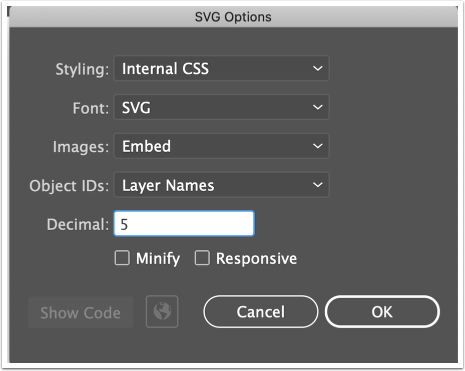
2. Export Template as SVG

3. Set up Sign Type in SignAgent

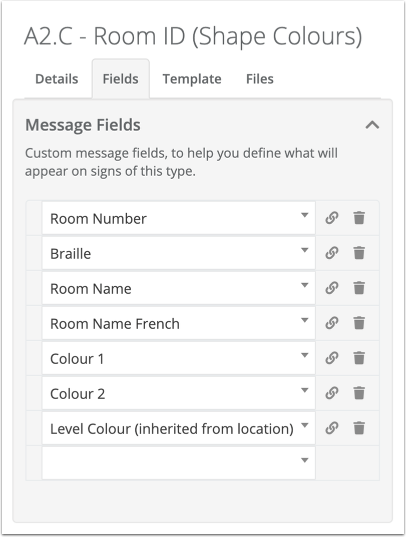
Next, set up the sign type with the necessary fields within SignAgent.
Note that I've set up Colour 1 and Colour 2 as Colour (choice) fields, but you could use Colour (hexcode), if you'd prefer.
For more information on how to set up sign types, check out this article: Adding Fields to Sign Types
For more information on choosing field types, check out this article: Manage Fields You can also easily access this interface for each field by clicking on the link icon.
4. Complete!

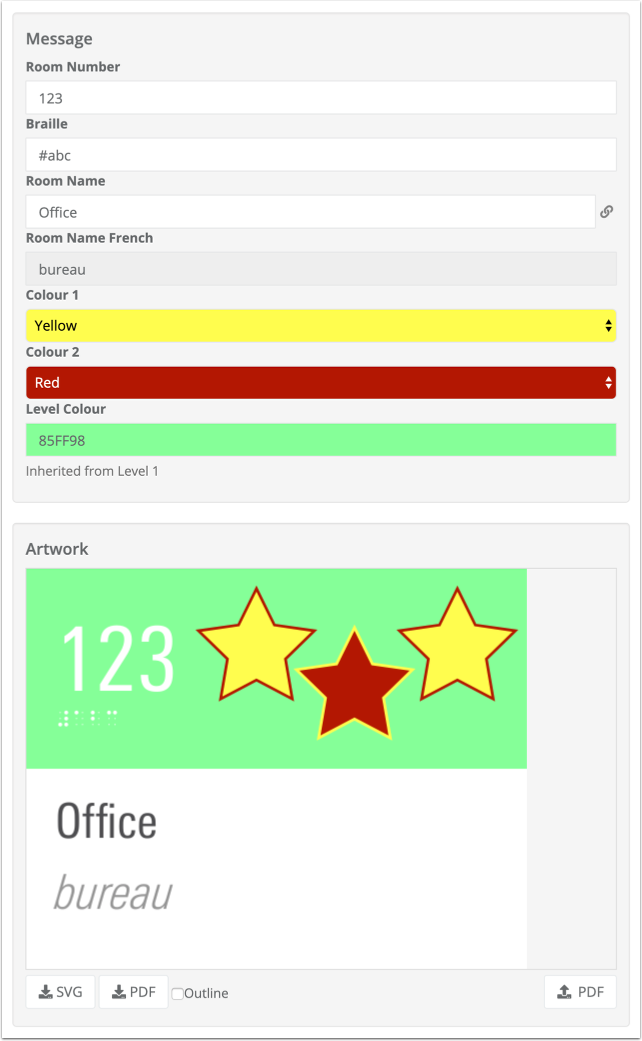
Complete! Note that stars 1 and 3 are applying a fill of Colour 1 and a stroke of Colour 2, and star 2 is reversed, just like we set it up.
SignAgent does not recommend this particular colour palette for your signs.
Want to have dynamic colours in your uploaded SignAgent visuals?
Check out this article: Dynamic Fill and Stroke Colours in Uploaded Visuals
