Different fills for different Phils!
Do your symbols change colours based on what sign they're on, and you can't upload visuals for every variation? This tutorial will teach you how to apply dynamic colours to your uploaded SVG Visuals!
1. Create SVG Visual
1.1. Create SVG Visual
Health_Services.svg
Create your SVG as usual. For each separate shape that needs to be coloured dynamically, use the following naming convention for the shape names:
fill_color: {COLOUR FIELD NAME}
stroke_ color: {COLOUR FIELD NAME}
In this example, I have 2 white rectangles making the cross in the middle, and a black rounded rectangle (with a green stroke) surrounding it. The two white rectangles have the shape names of:
fill_color: {color_1}
and the black rounded rectangle has the shape name of:
fill_color: {color_2}, stroke_color: {color_1}
These commands will work for all shapes, including rectangles, ellipses, rounded rectangles, stars, and polygons. Note that if you apply these commands to a line, only the stroke colour will be applied.
For more information on how to properly set up your layers in this template, check out this article: Create a Simple Room ID Template
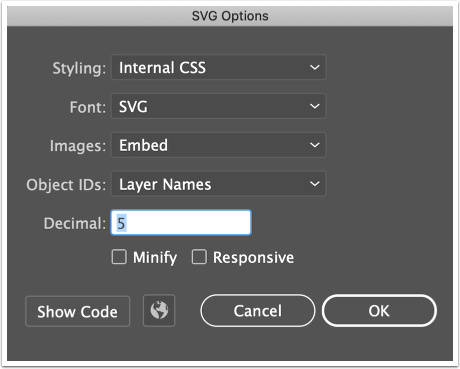
1.2. Export as SVG
1.3. Upload to SignAgent
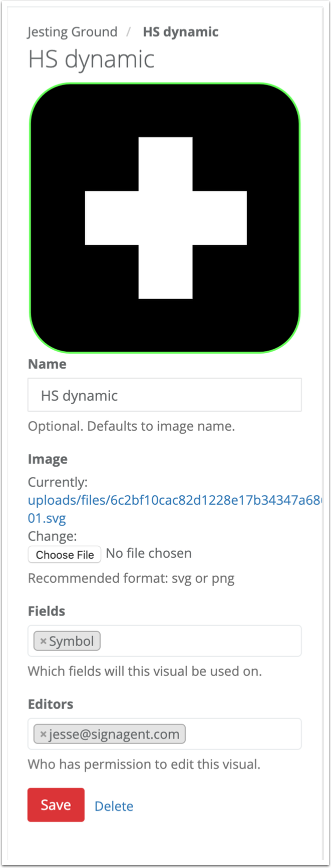
Upload your visual as normal, from the Manage Visuals page. For more information on how to do this, check out this article: Manage Visuals
2. Create Sign Type
2.1. Create Template in Illustrator

Nothing different or special here; just create your template as you normally would. In this example, I'll be using the Symbol field to place the SVG Visual created in step 1.1
If you need more info on how to create a template like this, check out these articles:
2.2. Set up Sign Type in SignAgent
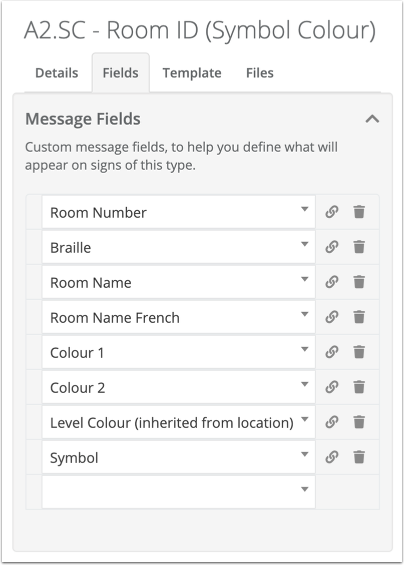
Next, set up the sign type with the necessary fields within SignAgent.
Note that I've set up Colour 1 and Colour 2 as Colour (choice) fields, but you could use Colour (hexcode), if you'd prefer.
Symbol is a Visual field.
For more information on how to set up sign types, check out this article: Adding Fields to Sign Types
For more information on choosing field types, check out this article: Manage Fields
You can also easily access this interface for each field by clicking on the link icon next to each field name.
3. Complete!

Complete! Note that the cross is being filled with Colour 1, and the rounded rectangle is using a fill colour of Colour 2 and a stroke colour of Colour 1.
SignAgent does not recommend this particular colour palette for your signs.